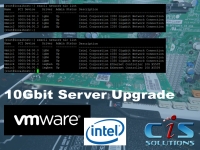

10Gbps backbone LAN connection
In current modern environments, a high speed connection between the hypervisor host and network storage devices is more then welcome to improve overall performance. An upgrade to a 10Gbps ethernet connection comes in handy.
What 10Gbps NIC to take
Before purchasing a 10Gbps NIC, it is important to verify what NIC is compatible with your system. Both on hardware and hypervisor level. When making your choice :
- Decide on what type of physical carrier you will use : copper or fibre;
- Decide on what type of interface on the NIC you want to use : RJ-45, DAC, SFP+;
- Verify what expansion slot in your server is still free;
- Verify what NIC is on the compatibility list of your hypervisor;
Once you have this info, it is time to go out and get your 10Gbps NIC.
Reality
For a customer, CIS Solutions had to upgrade a network link between an ESXi host and a Synology NAS from a 1Gbps to a 10Gbps connection. The server had no 10Gbps NIC available. Based on this start-situation, I made these choices :
- copper - short distances and a 10Gbps copper switch was available;
- RJ-45 - Cat 6A cable;
- The server had a free PCIe 3.0 x8 slot;
- In this case, I first verified what NIC was supported by the Synology NAS. Taking into account the above requirements, the Intel X550-T was a good option. I went to the VMware Compatibility Guide to verify if this NIC was on the compatibility list. The Intel X550-T is supported as native device on ESXi 6.5.
The choice : Intel X550-T.
Implementation
Physical installation
Nothing special : power off the system, open it and install the card in the correct slot. Pay attention for Electrostatic Discharge danger and user appropriate precautions such as ESD straps and mats.
Once the installation is done, close it and power it up.
VMware part
- Make sure you can access your system via SSH or the ESXi shell. If you have direct access to the host : press ALT+F1 to enter the ESXi shell.
- Show what NICs are installed :
esxcli network nic list
A list is displayed. Normally the 10Gbps NICs are not displayed. - To determine if the ESXi host is seeing the new NIC devices, run the command :
lspci -v | grep -A1 -i ethernet
A list is displayed with all the NIC that are seen by the host, thus including the 10Gbps NICs. - At the end of each line, you will see two figures, just like these
8086:1563 . The first figure is the VID (Vendor ID), the second the DID (Device ID). These numbers are important to determine what native driver must be enabled. - Select the Intel X550-t device on the VMware Compatibility Guide and click on the model name that equals the VID:DID numbers. A list of available drivers displays. Take note of the device driver name for the native driver; in this case
ixgben . - Run the vCLI command to enable one of the native drivers :
esxcli system module set --enabled=true --module=native_driver_name
Where thenative_driver_name isixgben (for Intel X550T - VID = 8086 / DID = 1563) - To confirm that you have the appropriate driver loaded on your system :
vmkload_mod -l |grep drivername
If a line is returned, the driver is installed and the card is recognized. If a line is not returned, the driver is not installed. - Show what NICs are installed :
esxcli network nic list
A list is displayed. This time the 10Gbps NICs are displayed.
Final test
It is time for a final test. Reboot your system, and log in into the graphical ESXi / vCenter environment and verify for this specific host the number of physical NICs under the Networking menu tab.